Gutter Installation & Gutter Guards in Vancouver, WA | Gutter Empire

It’s that time of the year when the air is crisp and the leaves are turning brilliant shades of red and gold. Fall in Washington is a beautiful season, but it should also serve as a critical warning bell for homeowners. Winter is coming, and those picturesque leaves are about to become your gutter system’s worst enemy. Ignoring them now could lead to a winter of discontent filled with ice dams, roof leaks, and damaged fascia.

Your home gutter system is a core defensive feature against Washington’s relentless winter weather. If the system is clogged or damaged, it cannot do its job. And when rain becomes snow and ice, the problems quickly multiply. As such, gutter winterization for Washington homeowners is not a suggestion, but a necessity.

Why Washington Winters Are So Hard on Gutters

Washington’s all-year-round damp weather and exceptionally wet fall season present a unique challenge since it deposits a constant layer of debris from our abundant vegetation. When winter brings freezing temperatures to many areas across the state, it sets the perfect conditions for gutter failure.

When gutters clog due to debris and moss buildup, water has nowhere to go and thus pools and freezes in the gutter system. This creates heavy blocks of ice that bend seams, pull away gutters from the home, and form ice dams on your roof. Ice dams prevent melting snow from draining and force water back under your roof shingles and into your attic. The result is stained ceilings, rotting rafters, and mold growth.

The combined weight of ice, snow, and debris puts a tremendous strain on the fascia boards where gutters are mounted, often leading to the need for fascia board replacement in Washington. That project can end up costing more than routine preventive maintenance.

Your Essential Fall Gutter Preparation Checklist

A little effort this fall can prevent a future catastrophe during winter. This guide will walk you through the simple, actionable steps needed for successful gutter winterization in Washington, protecting both your home and wallet.

Step 1: The Thorough End-of-Fall Cleaning

This is the simplest and most important step. Do not skip that fall season gutter cleaning and let winter find your gutters full of wet, heavy leaves.

  • Remove all leaves, pine needles, and moss by hand or with a scoop.
  • Flush the entire system using a garden hose to check for flow and reveal hidden clogs.
  • Ensure that water exits freely from the downspouts and does not pool at the base.

For many homeowners, this is a task best left to professionals. A thorough gutter cleaning in Washington from a company like Gutter Empire does more than just remove debris because experts can spot early signs of damage that the untrained eye might miss.

Step 2: Inspect for Damage and Leaks

Once the gutters are clean, you can now see what you are working with.

Look for the following warning signs:

  • Cracks or Splits: Even the tiniest hairline cracks can expand when water freezes inside them.
  • Rust or Corrosion: Gutters made of metal, such as steel, show orange-brown spots where the material is corroding.
  • Sagging Sections: These indicate that there are loose or broken hangers or fasteners that can no longer support the weight of ice.
  • Leaky Seams: Check where gutter sections are joined together for signs of separation or dripping.

If any of these issues are observed, then you need to seek professional gutter repair in Washington. Since these are minor maintenance tasks, patching small leaks and fixing loose fasteners now is infinitely cheaper than repairing water damage later.

Step 3: Ensure Proper Downspout Maintenance

Your downspouts are the exit chute for every gallon of water collected on your roof, and should thus be clear and functional. Therefore:

  • Ensure that downspouts extend at least five feet away from your home’s foundation.
  • Check that water is not dumping directly into flower beds or other areas where it can pool.
  • Consider adding downspout extensions or underground drains to route water even farther away from your foundation.

While the upper levels of your gutter system protect your fascia, exterior walls, and roof, this simple downspout maintenance step ensures that this protection extends to your foundation and ensures your home’s structural integrity.

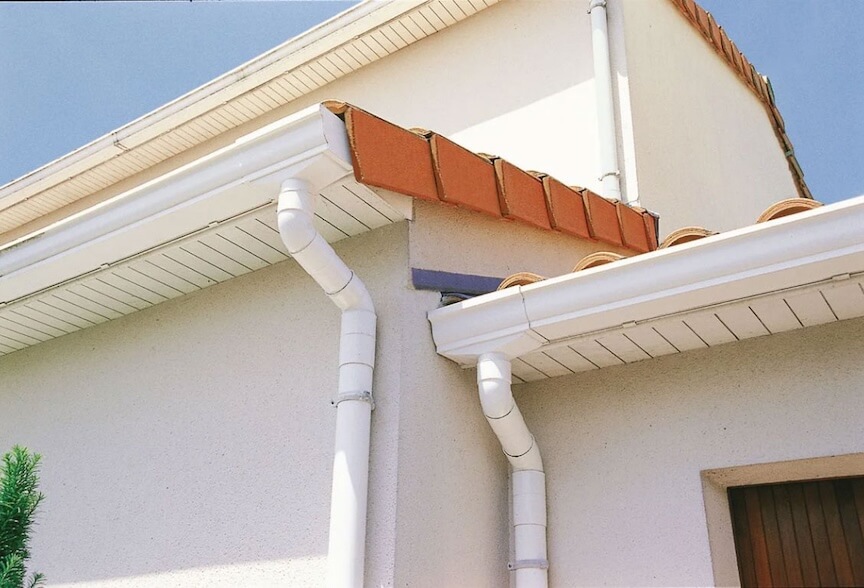
Step 4: Inspect Your Fascia Boards

Your gutters are mounted to horizontal straight boards known as fascia boards. While these boards give your home aesthetic appeal, they also have a structural function since this is where gutters are mounted. Therefore, these boards are highly susceptible to water damage from leaking or overflowing gutters. As such:

  • Look for signs of wood rot: Soft and spongy wood, bubbling or peeling paint, and visible water stains. Press on the wood behind the gutters; if it feels soft or crumbles, it is compromised.
  • Check for loose fasteners: Rotten fascia cannot securely hold gutter spikes or hangers, and this causes sagging, which eventually leads to complete gutter collapse under the weight of ice and snow.

If you find rot, then a fascia board replacement service in Washington is a non-negotiable repair that must happen before gutters can be repaired or new ones installed.

When to Call a Gutter Winterization Washington Service

While some gutter maintenance tasks are DIY-friendly, certain situations demand expert help. For instance:

  • When your home has more than one story.
  • You are not comfortable on a ladder or are unable to use one.
  • You find significant clogging, damage, corrosion, or sagging.
  • You suspect fascia board damage.
  • You simply do not have the time or desire to do it yourself.

Opting for professional gutter services near you from a company like Gutter Empire guarantees the job is done safely and correctly. Even for routine tasks such as gutter cleaning in Washington, we do not just clean. We also do a full system inspection, tighten all the hardware, and make quick on-the-spot repairs. If the damage is moderate or extreme, be assured that we can handle everything from simple maintenance to full fascia board replacement in Washington projects.

Do Not Let Winter Catch You Off Guard

While the transition from fall to winter in Washington is unpredictable, damage to your home does not have to be. Preparing with fall gutter winterization in Washington is one of the smartest moves a homeowner can make. You get to protect your roof, siding, and foundation, as well as your peace of mind and wallet.

As you continue to enjoy the joys of autumn leaves and the crisp air, let it be your reminder to schedule a gutter service.

Contact Gutter Empire today for a comprehensive fascia and gutter inspection and gutter cleaning in Washington. Our team will ensure that your system is pristine, secure, and ready to face whatever curveballs winter throws its way. Call us at (971) 777-9899 for more information or use our online free estimate tool.


Key Takeaways

  1. Washington winters create unique gutter risks — clogged gutters turn into ice dams, causing roof leaks, fascia rot, and costly structural damage.
  2. End-of-fall cleaning is critical — removing debris, flushing the system, and checking downspouts ensures proper water flow before freezing temps hit.
  3. Inspections catch hidden damage — cracks, rust, sagging sections, and leaky seams should be repaired before snow and ice make them worse.
  4. Fascia boards are highly vulnerable — rotting boards can no longer hold heavy gutters, leading to collapse under ice and snow loads.
  5. Professional gutter services offer peace of mind — experts provide cleaning, inspection, and repairs that prevent small issues from turning into major winter disasters.

Are you aware of the important parts of the gutter system installed at your house? Well, out of various elements, the exterior fascia board is one of the most important ones to know about. It is the part that holds up the gutter steadily and supports the roof’s bottom row section. Hence, apart from the gutter, you must also ensure that the fascia board remains intact and in good condition. Of course, when you see that the fascia board cannot be further repaired, you must replace it. But how do you know the fascia board requires a replacement?

Several signs will make you aware that the fascia board is screaming out for replacement. Now, replacing the fascia board can make you anxious if you are naive about the techniques. Do not worry, even if you do not have any idea about it. In this blog, we will help you identify the signs for replacement and will guide you through the process of replacing fascia board in Vancouver.

When Does Your Fascia Board Require Replacement?

Here are some common signs to state that your gutter fascia board needs a replacement now or not.

  • Soft Patches on the Wood:

When you notice soft patches on the wood, do not ignore them. These happen when the wood is rotting. This usually leads to weakening of the structure. This is one such type of damage that cannot be easily repaired. So, replacing fascia board in Vancouver remains the final option here. 

  • Flaking Paint:

Many homeowners think that flaking paint is not concerning, as it is a cosmetic issue. However, if you go deeper into the issue, you will find that most often such flaking happens due to a crack in the wood. Of course, the flaking paint can also be a result of excess moisture or age. So, if you are not sure of the cause, get in touch with an expert to get an idea before replacing fascia board in Vancouver

  • Presence of Small Animals or Insects:

Have you lately noticed droppings or claw marks on the wood? Search more, and you might even get a nest of insects or rodents residing in the attic or roof. This is only possible when these living organisms have found small holes in the fascia board. Check with your expert if you can continue with fascia board repair or if you need to replace it. 

  • Presence of Water on Roof:

If you see water on your roof, this is a clear sign that the fascia board or the soffit of the gutter system is leaking. Moisture on the roof and wood will lead to mold and other negative results, causing structural damage. Call upon the professionals at the earliest to get an inspection done in such a case. 

  • Issue with Ventilation:

Lack of ventilation can cause several problems, such as moisture issues. So, if you notice mold or moisture-related issues in your house attic, it may also happen due to a lack of ventilation. Now, this may happen if there is a blockage in the fascia vents. At times, this can be repaired. However, in case of a major blockage, replacing fascia board in Vancouver is the only choice left. 

  • A Change in Aesthetics:

While you may replace fascia boards when they are replaced, there are also some aesthetic reasons to follow. If you wish to get a new style of fascia board or want something to match your newly renovated exterior wall, you can consider replacing fascia board in Vancouver

Now, whether your house’s fascia board has worn out or you want to offer it a new look, you must know about the techniques of replacing fascia board in Vancouver. If you are not aware of it, this guide will help you further in understanding the basic techniques.

Tools Required for Replacing Fascia Board in Vancouver

 Before understanding the techniques of replacing fascia boards, you must know about the tools that you will need in the process. 

  • New Fascia Board to install
  • Hammer
  • Mitter or circular saw
  • Exterior nails or wood screws of 2 inches
  • Pry bar
  • Utility knife
  • Caulk gun
  • A Ladder

While you gather all these tools, ensure that you also have a helper for safety purposes. 

How to Replace Fascia Board?

When you are ready with all the tools and a helper, you can follow these steps to replace fascia board. 

  • Inspection and Measurement

One thing that you need to know is that you can replace only the damaged area of fascia boards, instead of the whole thing. So, the first step is to inspect the damage in the process of fascia trim replacement. You can use a pry bar to check the damaged fascia boards. The damaged parts will easily break when you use a pry bar. 

Now, once you are aware of the damaged area or the ones you wish to replace, start measuring them. This measurement is required so that you can get the boards of the same measurement. You can measure the boards using a tape to check the length, thickness, and width of each board. Carefully note all the measurements so that you do not make mistakes in getting the appropriate fascia boards. 

  • Getting New Materials

Just getting the correct measurements is not enough to purchase new fascia boards. You also must consider other essential factors such as durability, material, aesthetics, maintenance requirements, and budget. You will come across various compositions like aluminum, vinyl, wood, or even composite while replacing fascia board in Vancouver

You must know the pros and cons of each material before owning it. For example, wooden boards offer a natural appearance, while you can choose a composite board for lower maintenance. Similarly, vinyl material is affordable and weather-resistant. On the other hand, a fascia board made up of aluminum is flexible, lightweight, and corrosion-resistant. Choose the right option according to your preference and requirements. 

  • Remove the Damaged Board

You can use the same pry bar to remove the board that you have used for inspection. Along with the pry bar, use a hammer to remove the short sections that connected the boards. Be gentle during the process so that you do not damage other parts of the structure. Cut the board into shorter pieces to remove the board easily. While removing the board, you also need to remove any wooden backing that is damaged. 

If your gutter system is installed over the fascia board, you will have to remove the gutter first to reach up to the board. With the help of a helper, use a pry bar to uninstall the old gutter system and then the damaged fascia board. Once you have removed the gutter system, check it properly for any damage and repair it accordingly before reinstalling. Attach the new fascia board and then install the gutter system. 

  • Cut New Boards

Ensure you make the right cuts on the boards according to the measurements you have taken. Double-check the measurements before you make the cuts so that you do not end up getting the wrong results. Always go for a miter or circular saw to get precise cuts. You will get perfect results if you use the correct tools and double-check the measurements before cutting. 

  • The Installation:

Go slow for the installation process. Start from one end and install one board after another. Complete the screwing process of one board on the rafter before installing the next one. While exterior wood nails and screws are considered ideal, you must also consider manufacturer’s guidelines for the installation process. Check the joints and corners carefully so that they have sealed properly, using an exterior-grade caulk. 

  • Fix the Ends

Ensure to put caps on the ends and corners of the fascia board for a much cleaner appearance. Apart from offering aesthetic appearance, these covers also protect the board from moisture. To offer better protection, use screws and nails to secure the caps. 

  • Use Paint for Final Touch

This is an optional thing to do. However, a good paint on the fascia board offers a protective layer for higher durability. When you have invested in getting a good gutter system, it is always a great idea to paint it to enhance its life. 

With all these steps, you can easily get your fascia board installed. However, you must ensure to get proper help and conduct safety measures during the installation process. Ask your helper to hold your ladder while you are working upstairs. With proper tools, help, and the above steps, you can get great results at the end. 

Fascia Board Replacement Cost

Replacing fascia board in Vancouver should usually cover the cost of the material and the tools if you are doing it all yourself. In case of DIY, you may get a costing somewhere in between $3 to $20 per foot of a new fascia board, according to the material you choose. 

However, if you are not sure of the result in case of DIY, it is always advisable to seek professional help. When you ask for a professional service, you will get a guaranteed quality result along with convenience. On average, you may have to invest somewhere between $1000 to $5000 for  fascia board replacement in Vancouver professionally

Should You Hire a Professional to Replace Fascia Board?

While many homeowners in Vancouver may consider replacing the board DIY, there are some potential reasons why you should hire a professional for the job. Some of the common reasons to hire to replace fascia board in Vancouver are:

  • Steep roofs that require higher safety measures 
  • Replacement of the whole fascia along with the soffit and gutter
  • Difficult to remove gutters
  • Rotten wooden structure

Check out and hire the best professional who can offer you reliable service at a budget that suits you. Always get a quote from different service providers to compare their services along with the costing to get the most suitable option available.