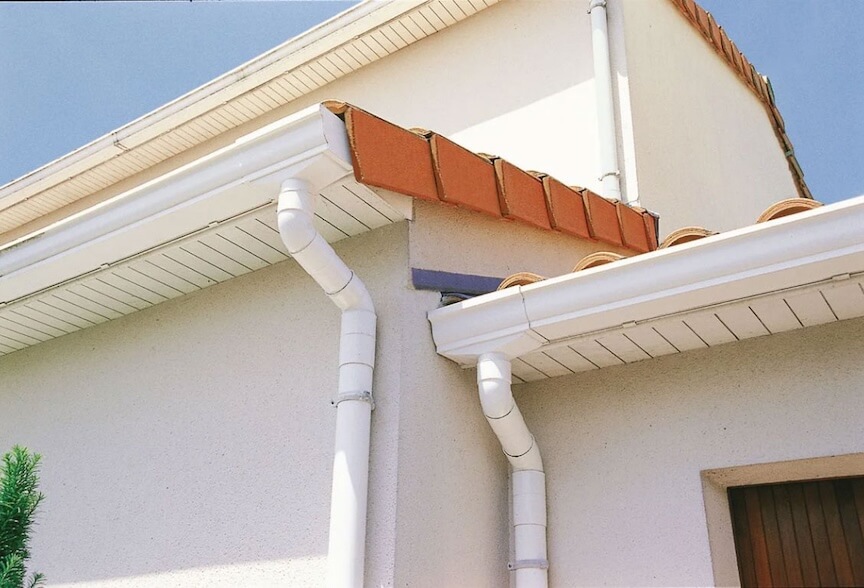
Are you aware of the important parts of the gutter system installed at your house? Among various elements, the exterior fascia board is one of the most important to know about. It is the part that holds the gutter steadily and supports the bottom row section of the roof. Hence, apart from the gutter, you must also ensure that the fascia board remains intact and in good condition. Of course, when you see that the fascia board cannot be further repaired, you must replace it. But how do you know the fascia board needs to be replaced?
Several signs will alert you that the fascia board is in need of replacement. Now, replacing the fascia board can be intimidating if you are unfamiliar with the techniques. Do not worry, even if you have no idea about it. In this post, we will help you identify the signs for replacement and will guide you through the process of replacing fascia board in Vancouver.
When Does Your Fascia Board Require Replacement?
Here are some common signs to determine if your gutter fascia board needs replacement now or not.
- Soft Patches on the Wood:
When you notice soft patches on the wood, do not ignore them. These happen when the wood is rotting. This usually leads to weakening of the structure. This is one such type of damage that cannot be easily repaired. Therefore, replacing the fascia board in Vancouver remains the final option.
- Flaking Paint:
Many homeowners believe that flaking paint is not a concern, as it is a cosmetic issue. However, upon closer examination, you will find that most often such flaking occurs due to a crack in the wood. Of course, the flaking paint can also be a result of excess moisture or age. So, if you are not sure of the cause, get in touch with an expert to get an idea before replacing the fascia board in Vancouver.
- Presence of Small Animals or Insects:
Have you lately noticed droppings or claw marks on the wood? Search more, and you might even get a nest of insects or rodents residing in the attic or roof. This is only possible when these living organisms have found small holes in the fascia board. Consult with your expert to determine if you can proceed with fascia board repair or if replacement is necessary.
- Presence of Water on Roof:
If you see water on your roof, this is a clear sign that the fascia board or the soffit of the gutter system is leaking. Moisture on the roof and wood can lead to mold and other negative consequences, ultimately causing structural damage. Contact the professionals at the earliest opportunity to arrange an inspection in such cases.
- Issue with Ventilation:
Lack of ventilation can cause several problems, such as moisture issues. So, if you notice mold or moisture-related issues in your house attic, it may also happen due to a lack of ventilation. This may occur if there is a blockage in the fascia vents. At times, this can be repaired. However, in the event of a major blockage, replacing the fascia board in Vancouver is the only viable option.
- A Change in Aesthetics:
While you may replace fascia boards when necessary, there are also aesthetic reasons to follow. If you wish to get a new style of fascia board or want something to match your newly renovated exterior wall, you can consider replacing the fascia board in Vancouver.
Now, whether your house’s fascia board has worn out or you want to offer it a new look, you must know about the techniques of replacing fascia boards in Vancouver. If you are not aware of it, this guide will help you further in understanding the basic techniques.
Tools Required for Replacing Fascia Board in Vancouver
Before learning the techniques for replacing fascia boards, it is essential to understand the tools required for the process.
- New Fascia Board to install
- Hammer
- Miter or circular saw
- Exterior nails or wood screws of 2 inches
- Pry bar
- Utility knife
- Caulk gun
- A ladder
While gathering all these tools, ensure you also have a helper for safety purposes.
How to Replace Fascia Board?
When you are ready with all the tools and a helper, you can follow these steps to replace the fascia board.
- Inspection and Measurement
One thing to note is that you can replace only the damaged area of the fascia boards, rather than the entire piece. The first step is to inspect the damage during the fascia trim replacement process. You can use a pry bar to check the damaged fascia boards. The damaged parts will easily break when you use a pry bar.
Now, once you are aware of the damaged area or the ones you wish to replace, start measuring them. This measurement is required so that you can get the boards of the same measurement. You can measure the boards using a tape to check the length, thickness, and width of each board. Carefully note all the measurements to ensure you do not make mistakes when selecting the appropriate fascia boards.
- Getting New Materials
Just getting the correct measurements is not enough to purchase new fascia boards. You must also consider other essential factors, such as durability, material, aesthetics, maintenance requirements, and budget. You will come across various materials, such as aluminum, vinyl, wood, or even composite, while replacing fascia board in Vancouver.
You must be aware of the pros and cons of each material before purchasing it. For example, wooden boards offer a natural appearance, while composite boards are available for lower maintenance. Similarly, vinyl material is affordable and weather-resistant. On the other hand, a fascia board made up of aluminum is flexible, lightweight, and corrosion-resistant. Select the option that best suits your preferences and requirements.
- Remove the Damaged Board
You can use the same pry bar to remove the board that you have used for inspection. Along with the pry bar, use a hammer to remove the short sections that connected the boards. Be gentle during the process to avoid damaging other parts of the structure. Cut the board into shorter pieces to make it easier to remove. When removing the board, also remove any damaged wooden backing.
If your gutter system is installed over the fascia board, you will have to remove the gutter first to reach the board. With the help of a helper, use a pry bar to uninstall the old gutter system and then the damaged fascia board. Once you have removed the gutter system, inspect it thoroughly for any damage and make the necessary repairs before reinstalling. Attach the new fascia board and then install the gutter system.
- Cut New Boards
Ensure you make the right cuts on the boards according to the measurements you have taken. Double-check the measurements before making the cuts to ensure accurate results. Always use a miter or circular saw to achieve precise cuts. You will get perfect results if you use the correct tools and double-check the measurements before cutting.
- The Installation:
Go slow for the installation process. Start from one end and install one board after another. Complete the screwing process of one board on the rafter before installing the next one. While exterior wood nails and screws are considered ideal, it is also essential to consider the manufacturer’s guidelines for the installation process. Check the joints and corners carefully to ensure they have sealed properly, using exterior-grade caulk.
- Fix the Ends
Ensure to put caps on the ends and corners of the fascia board for a much cleaner appearance. Apart from offering aesthetic appearance, these covers also protect the board from moisture. To offer better protection, use screws and nails to secure the caps.
- Use Paint for the Final Touch
This is an optional activity. However, a good paint on the fascia board offers a protective layer for higher durability. When you have invested in getting a good gutter system, it is always a great idea to paint it to enhance its life.
With all these steps, you can easily get your fascia board installed. However, you must ensure that you get proper help and conduct safety measures during the installation process. Ask your helper to hold the ladder while you work upstairs. With the proper tools, help, and the above steps, you can achieve great results in the end.
Fascia Board Replacement Cost
Replacing the fascia board in Vancouver should typically cover the cost of the material and tools if you are doing it yourself. For DIY projects, you can expect to pay somewhere between $3 and $20 per foot for a new fascia board, depending on the material you choose.
However, if you are unsure of the result with DIY, it is always advisable to seek professional help. When you request a professional service, you can expect a guaranteed quality result, along with added convenience. On average, you may have to invest somewhere between $ 1,000 and $ 5,000 for fascia board replacement in Vancouver professionally.
Should You Hire a Professional to Replace Fascia Board?
While many homeowners in Vancouver may consider replacing the board DIY, there are some potential reasons why you should hire a professional for the job. Some of the common reasons to hire to replace fascia board in Vancouver are:
- Steep roofs that require higher safety measures
- Replacement of the whole fascia, along with the soffit and gutter
- Difficult to remove gutters
- Rotten wooden structure
Check out and hire the best professional who can offer you reliable service at a budget that suits you. Always obtain quotes from different service providers to compare their services and costs, allowing you to select the most suitable option available.
Last updated: October 2025